Header/Navigation Bar/Social Media Icons

Wednesday, July 22, 2015

Some Of My Favorite Homesteading Books


I have read lots of books and blogs on homesteading, but these 3 are my current favorites.  Ok, I realize that Mother Earth News is not technically a book, but you know what I mean.

Some of my favorite book:

Mother Earth New Magazine

Mother Earth News is such a fun magazine if you area at all into gardening, homesteading, or country living. Each issue has something for everyone. I find myself getting so excited every time a new issue comes in the mail. It is so sad that I can't wait for the kids to go to bed that night so I can dig in. 

If you decide to buy any of the Mother Earth News magazines you will get a better bang for your buck if you go ahead and buy a 1 yr subscription. If you buy just one magazine at the store you will spend $6, but if you get a subscription you get 6 issues for a total of $12! 

The Backyard Homestead: Produce all the food you need on just a quarter acre!

The Backyard Homestead is one of the books that gave me the homesteading bug. It is an excellent source for beginners. The great thing about this book is that it has info for homesteaders no matter how much land you have. I particularly liked the photo in the book (pictured below) of how you can set up a working farm on as little as a quarter of an acre. The yard in the picture is laid out a lot like mine. I am hoping to someday have all the things in the picture actually up and running. 

The Backyard Homestead has chapters to help you get started with garden layout, animal care and preserving. If you are looking for a great beginner book this is the one I would recommend. 


The Five-Year Guide to Self-Sufficiency: Simple Living Made Simpler

My third current favorite book is the Five-Year Guide to Self-Sufficiency. This is not really one I have read cover to cover, but have used it more as a reference guide. Since it is meant to be used over a five year time period. 

The chapters are broken up into how and what to concentrate on each year for 5 years to help you be successful on your homestead adventure. 

I love that it starts out very slow and reminds you not to take on too much at one time. It will walk you step by step through deciding what land to buy and what to look for when purchasing your land. 

I have to say my favorite part of this book is that it recommends as your first step to homesteading is getting our of debt. Ugh. Unfortunately we are still working on that one. At least we are not taking on anymore. 

What are some of your favorite homesteading books?

This post contains affiliate link

Tuesday, July 21, 2015

Delicious Summertime Watermelon Slush!


Watermelon slushies are some of my families favorite summertime treats. I am one of those really weird people who really don't care for watermelon, or any melon for that matter. I know it's not normal to dislike melon, but I LOVE these slushes. They are so nice on a hot summer day. Not to mention they are really quick and easy to make. 

Watermelon Slushes

2 large handfuls of ice
2 -3 cups watermelon
2 tablespoons lemon or lime juice
2 tablespoon sugar (or more to taste)

Throw everything in the blender and blend until smooth. Thats it! Now you have a cold summertime treat that your kids will love. Even better no food dyes.

Saturday, July 18, 2015

How To Braid Garlic


I have to start this post by apologizing for my less then stellar photos....not that my usual ones are all that great. These just seem to be much worse then usual. One of these days I will be able to invest in a better camera, but or now my camera phone will have to do. Thanks for sticking around     anyway.

I have always been intrigues by beautiful braids of dried garlic so I decided that this year I would have to learn how to do it. It really was not nearly as hard as I had expected it to be.  Basically if  you can braid a simple braid you can do this.

Before you braid your garlic you need to make sure it is completely cured. Mine has been sitting in my garage for about a month now and was nice and dry.


To get started take 3 garlic stalks and lay them next to each other. 


Start braiding them just like a normal braid.


After you have the braid started you will then add a new garlic stalk to each of the 3 you already have in the braid. At this point you should have 6 garlic bulbs.

Keep doing the same thing until you have used up all your garlic or you think the braid is large enough.


Remember to keep adding the garlic bulbs in multiples of 3. My poor garlic is so ugly. I could not get all the dirt off no matter how hard I tried. It was cemented on and I did not want to break any of the bulbs.


After all your garlic has been added to the braid you just keep braiding the rest of the stalk all the way up to finish it off. I used a piece of twine to tie off the top and to use as a loop for hanging.

Hopefully by now you have a nicely braided bundle of garlic to store for later use. I am for sure going to have to grow LOTS more garlic next year now that I know how easy it is to grow, cure and store. Especially since we eat so much garlic around here.

Friday, July 17, 2015

From Garden To Table: Garden Pasta Salad


I thought I would do a little followup on a picture I posted to my facebook page last night that was very popular.

I often see pictures of gorgeous produce that people pick from their gardens and wonder what they are planning to make with it. I love recipes and can always use some fresh ideas. 

Last night I was too hot and tired to bother cooking what I had on the menu plan. I decided to opt for a quick pasta salad. That way all I had to cook was the pasta and chop a few veggies. That seemed doable. 


After cooking the pasta I took a cucumber, sweet basil, purple basil and some green onions from this basket and turned them into dinner. I only wish the tomatoes had been ripe. They would have been so good in this.

It was so simple and only took a couple of minutes. I also decided to make some smoothies with some frozen fruit I had to help cool everyone off. Shh don't tell the kids I snuck some cucumber into their smoothies. They never said a word.

Garden Pasta Salad

1/2 box cooked pasta
1 chopped and peeled cucumber
1 handful sweet basil
1 handful purple basil
3 chopped green onions
Fresh shredded asiago cheese (Parmesan would also work)
2 tablespoon olive oil
salt and pepper to taste
pinch crushed red pepper
1 clove garlic

Basically you can toss any fresh, raw veggies you might have and any spices that you like. Be creative.

If I can stand the heat in the kitchen today I think I will make some bread for the kiddos with the extra zucchini. 


Thursday, July 16, 2015

All Natural Bee And Wasp Sting Treatment That Works!


Last summer both my mom and daughter ended up with nasty wasp stings. I used this treatment on both of them and within minutes they both saw relief.

My daughter got stung right on the face near her ear. She does not handle pain well so I was excited to see how quickly she felt better.

This treatment is simple and only uses natural ingredients. If you haven't noticed yet I use a lot of lavender oil around here. It seems to be my go to when one of the kids has a skin issue.

Ok, here we go...

You will need some bentonite clay and lavender oil for this treatment. As well as some sort of gauze and wrap to hold everything on. Whatever you have on hand should work.


To start with take about a tablespoon or so of the bentonite clay and mix it in a small bowl until you get a thick paste. You want it to be able to stick to the skin.


Next you want to apply one drop of lavender oil directly on the sting. Check to make sure the stinger is out. If it is still there this treatment will help, but it will continue to hurt until the stinger is removed. If the stinger is still in it will continue to deliver poison to the wound causing pain.

After you are sure the stinger is out and you have applied the lavender oil take a small spoonful of the bentonite clay mixture and place it on the sting.

My daughter could not figure out why I was putting mud on her. She thought it was a little weird, but I didn't hear any complaining once she figured out it worked.


After you have the oil and clay in place you want to keep it there. The best way I have found to do this is to cover the sting with some gauze.


Next you want to hold the gauze in place. I happened to have some medical tape so I used it to tape the gauze on. An ace bandage would work as well.


After you have everything in place allow it to sit for an hour or so. You can replace the clay as needed until the pain is gone. In my experience we have only had to maybe replace everything once. My mom's sting took a day or so to heal because we did not notice the stinger was still in her finger. Once the swelling went down we were able to scrape it out and reapply the oil and mud and it was better within 24 hours.

Please remember that I am not a doctor, just a mom sharing what has worked for me. If you notice any excessive swelling or redness please discontinue this treatment and see a doctor. Especially if you think you may be having an allergic reaction to a sting.

This post contains affiliate links.

Tuesday, July 14, 2015

Homemade Strawberry Jam


I wasn't able to grow any berries this year, but I was able to find a great deal on some strawberries. So I decided this would be a great time to stock up and make some delicious strawberry jam to store for later.

I am not an expert on canning, but I have made jam, applesauce, pear butter, and pickles before. Basically anything that can be water bath canned I am ok with doing. If you need more info from an expert on canning You Pick You Own is a website that has TONS of info on how to can just about everything you can think of. They also have a huge list of you pick farms in every state.

The recipe I use is one I found in a Ball Canning cookbook that I bought several years ago. If you have never tried canning before don't let it intimidate you. Water bath canning is really not as difficult as it looks. One of these days I am going to get brave enough to give pressure canning a try...that is if I can find someone to give me a lesson or two before I invest in a pressure canner.

Here is my recipe for homemade jam along with a step by step picture tutorial.

Strawberry Jam

2 quarts washed and hulled berries
3 cups sugar
1 cup water
1 package pectin


 The first thing you need to do when starting strawberry jam is to take the tops off of about 2 quarts of berries and wash them thoroughly. 

Set the fruit aside and get your canning supplies ready. 


 These next steps are very important to make sure you have sterile equipment to work with. When canning you want to make sure everything you work with is clean so you don't end up with things growing in your preserved food that could make you sick.

I start with a large canner filled with water and set it on the stove to boil. This can take a while since you have such a large amount of water to boil. Make sure to start this step first.

I use a 21.5 qt canner that you can find at Amazon, Walmart or just about anywhere you can buy canning supplies.


Next you need to get out a jar funnel, jar grabber and a magnetic lid lifter. Make sure these are clean as well.


I decided to go with small jelly jars this time around. It is very important that the jars are sterile and remain hot until you are ready to fill them. There is nothing worse then getting your jam ready to put in jars and then having a jar break because it was not hot enough when you put in the hot jam.

Some people like to put there jars in the dishwasher to sterilize them, but that method makes me nervous. I prefer to boil them for at least 10 minutes to make good and sure they are clean and stay hot.

Fill the jar rack that comes with your canner with empty jar and put them in the canner once the water is boiling and let them boil for 10 minutes. Try to do this as close as possible to the time when your jam is ready to fill the jars so they are still hot.


You also need to make sure your lids are sterile and warm. I do this by putting them in a pot of very hot, but not boiling water. You don't want the water to boil because it could cause the seals on the flats to not work properly. Leave them in the water until you are ready to use them.


Oops I took this picture sideways and can't get it flipped, but you get the idea.
The next step is to get your strawberries, water and sugar into a large stock pot. Some people leave their berries whole and crush them once they are in the pot. I am lazy and just stick mine in my vitamix to crush them. My kids do not care for chunky jam so it is easier to make sure it is pureed.

Mix the sugar and berries together and let them come to a full boil. Make sure you keep stirring so the mixture doesn't burn.

Boil for 1 full minute.


Next add your pectin and keep boiling for another full minute.


Make sure to keep stirring. It would be terrible to end up with a burnt taste in your jam.


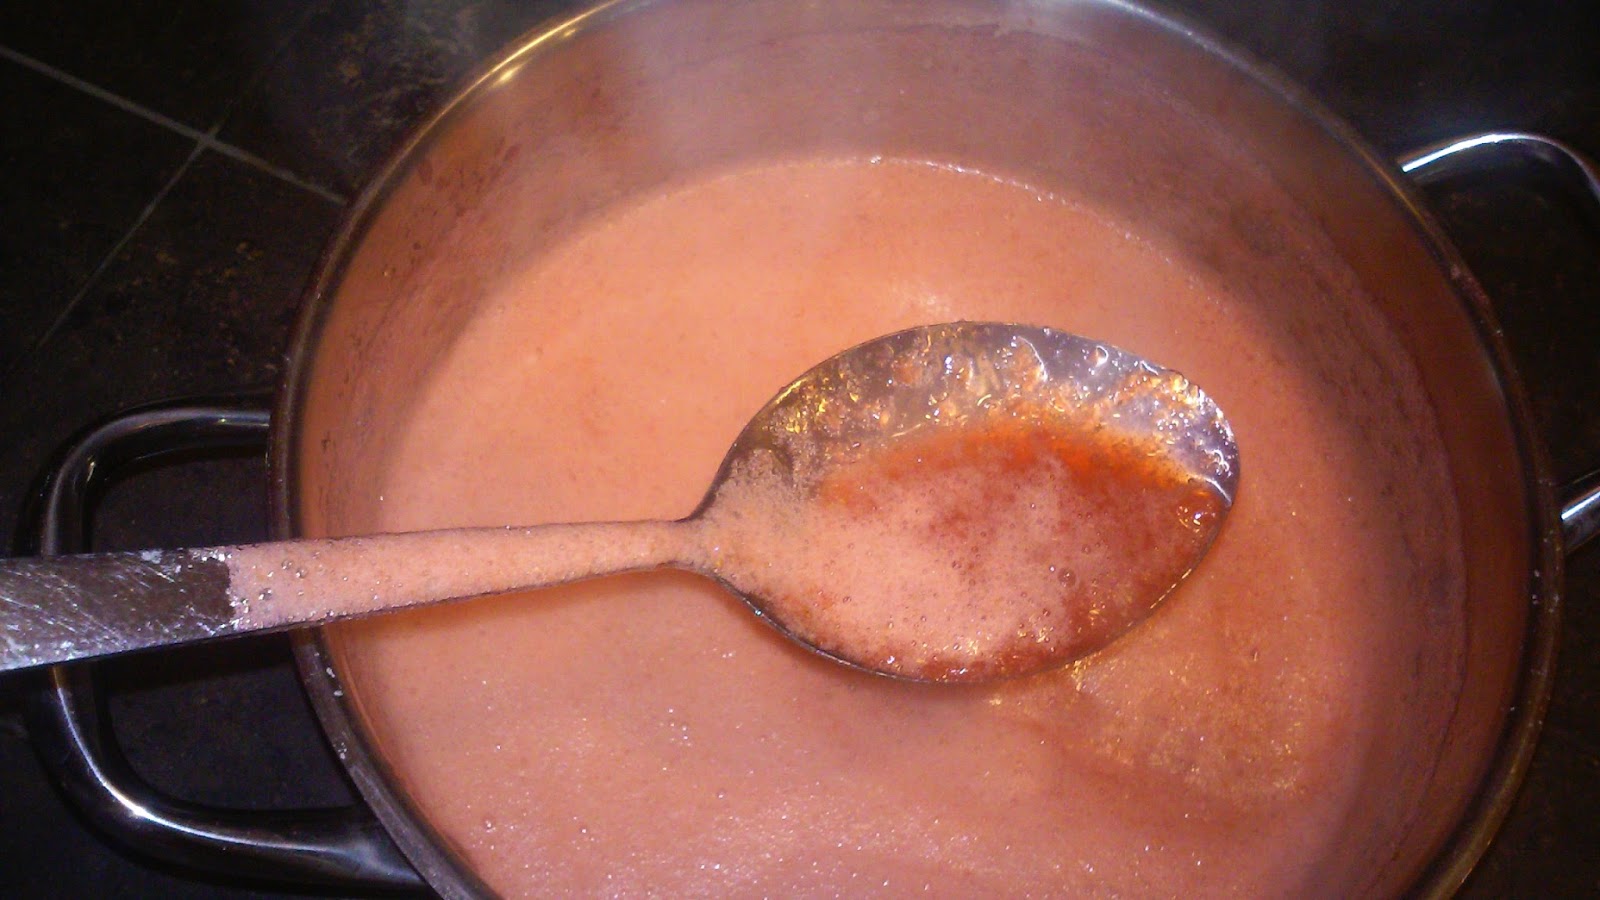
Your jam is ready to go into jars when it starts to gel. One way to check and see if it is ready is to dip a spoon in the pot and then pop it into the freezer. If it comes out after about a minute and has gelled it is ready to go.

For some reason this round of jam never did gel. I finally gave up and made strawberry syrup sort of jam like substance. It still tasted great and worked on toast. I wonder if I put too many berries in. Oh well, we will still eat it.


 Once you are sure the jam is ready to go start ladling it into your pre-sterilized, still hot jars.


Keep going until you have filled all your jars. I think this made about 7 small jelly jars full.

Fill each jar leaving 1/4 inch of head space in each jar. If you buy a canning kit there should be a tool to help you measure this. I don't currently have one so I had to eyeball it. I guess I need to get one.


I failed to get a picture, but make sure you run a damp rag around the edge of your jar after filling to make sure there is nothing spilled on it. If they are dirty or chipped the jars will not seal and can cause botulism to grow in your food.

After you are sure the jars are clean take your wand and pick up a flat from the water and place one on each jar.

Next take a rind and place it on each jar. Tighten it slightly, but not too tight.


After your jars are filled and the lids are on place them in the basket and into the boiling water. BE CAREFUL. The jars and water are very hot and burn. Ask me how I know.

Boil your jam for 10 minutes.


After the jars have boiled for 10 minutes remove them from the water and use your jar grabber to take each jar out of the basket and carefully place them on a towel. Jars will be extremely hot and can still break at this point.


Leave the jars alone until they have completely cooled.


If everything goes well you should start hearing popping sounds. This is a good thing. It means your jars are sealing. You can test them with your finger. If they don't bounce back it means they have sealed.

I did have one not seal this time. It was my own silly fault. I accidentally put 2 flats on the jar without noticing. Since this jar did not seal we had it with dinner. It is not safe to reboil a jar if it does not seal. The seal on the flat may be bad. The best thing to do is to put the jar in the fridge and eat it soon or reboil the jam and start again with a fresh flat.

I rarely have jars that don't seal.


After everything has cooled you can remove the rings so they don't rust shut. Make sure you label what is in your jars and the date.

This process really doesn't take as long as it looks like it does. You will feel so good knowing that the jam you are serving was homemade. They also make great gifts.

This post contains affiliate links.


Monday, July 13, 2015

Bird Flu In Kansas Affecting Egg Prices


This is a post I wrote last month for one of my other blogs. I thought it would be a nice fit for my homesteading friends as well.

If you go into the grocery store here in Kansas you will notice the price of eggs has skyrocketed...that is if you can even find eggs. On a recent shopping trip I noticed that nearly all the eggs were gone and the ones that were there were very expensive. Bird flu has caused the death of many chickens in the state causing this shortage. (As of this posting date it seems eggs are easier to find in the grocery stores.)

Kansas has had to go so far as to ban chickens from all fairs this year.  There is a really great article in the Wichita Eagle from June 10th describing how this will affect this years state fair. 

I am so thankful that we have our little flock of backyard chickens. The girls we have currently are not old enough to lay eggs yet, but I know we have them as a backup later in case this shortage continues long term.

This is our second flock of chickens (the first set from last summer met with my mom's Great Dane and lets just say things did not end well). They make some of the best pets I have ever had. I was shocked to see that each one has a personality. Growing up I never really thought of them as pets, but just a farm animal. Seriously, if you have a backyard you need to look into getting 2 or 3. You might be surprised how many cities allow hens, just not roosters.

Another great reason to keep chickens is you know exactly where your food is coming from, what it ate and how it was handled. My birds are spoiled with full run of my large backyard. Homegrown eggs are not necessarily cheaper then store bought once you add in the cost of raising chickens, but they are MUCH tastier and, in my opinion, better for you. You will never want to go back to store bought eggs once you have had a fresh egg straight from the nest.

Try comparing a store bought raw egg and a farm fresh one next to each other in a bowl and check out the color difference in the yolk. We found it amusing once when we tried to make a blue cake for a birthday and it turned out very green.

If you want more info on keeping backyard chickens you can go here to learn everything you need to know.

Wednesday, July 8, 2015

Our Squash May Be In Trouble


I have been noticing lately that my zucchini plants are not looking as healthy as they did about a month ago. We used to have lots of blooms and it looked like I would have tons of zucchini soon. Then suddenly the plants started to look sick and some of the vine started to turn brown.


At first I thought these guys might be causing the problem. They might be part of the issue since I think they may be eating some of the blossoms, but on further inspection I think our the culprit is squash vine borers


These are some photos I took today of the base of the vines near the roots. They look like they are rotting away. I got online and searched for zucchini diseases and these pictures look very similar to borer damage.

This is a picture I got from the University of Maryland's Extension website. It looks exactly like mine except I have not seen the larvae.

Unfortunately it does not look good for my zucchini this year. From everything I have seen there is not much that can be done for this problem once the plants start to wilt. In fact, I read that if I don't pull the plants and get rid of them the problem will happen again next year.

All the treatments I found said to use chemicals to treat the bugs and that defeats the whole purpose of organic gardening.

I will keep researching it and let you know if I come up with a solution.

I would really appreciate any ideas any of you have.

Tuesday, July 7, 2015

Cucumber Chips


It's cucumber season around here. In the past I have always made pickles with what we did not eat fresh. This year I decided to try something different. I did some research to see if there was another way to preserve them without canning. 

It turns out you can dry them and make chips or dry them to save for soups in winter. I decided to give chips a try. 

This method was really quick and had some tasty results. 


Start by gathering all your cucumbers and give them a good rinse to get the dirt off. 


Next, slice all the cucumbers as evenly as possible. 


 Lay them in a single layer on the tray of your dehydrator. I personally have an excalibur dehydrator which I LOVE. I use it for so many things. It is totally worth the investment.


I decided to use some of my ranch dip mix to sprinkle on top for some flavor. (Recipe at the end of this post.)


After each cucumber was sliced and seasoned they went into the dehydrator to "cook".


I followed my dehydrators recommendation of drying at a temperature of 125 degrees. Temps may vary depending on what kind of  machine you use. I may have to try this in a solar dehydrator sometime.

Allow the cucumbers to dry until they are crispy. Mine took overnight. I was pleasantly surprised at how these turned out. To be honest I wasn't expecting to like them. 


Ranch Dip Mix


5 Tablespoons dried minced onions

7 teaspoon parsley flakes
4 teaspoon salt
1 teaspoon garlic powder

To make ranch dip mix 2 tablespoons mix with 2 cups sour cream.

This recipe if from Heavenly Homemakers. Check our Laura's. She has so many yummy recipes.