Header/Navigation Bar/Social Media Icons

Tuesday, June 30, 2015

The Good, The Bad, and The Ugly of Homesteading

Homesteading has so many aspects. There is a lot of beauty in it and many victories. Unfortunately there is another side. 


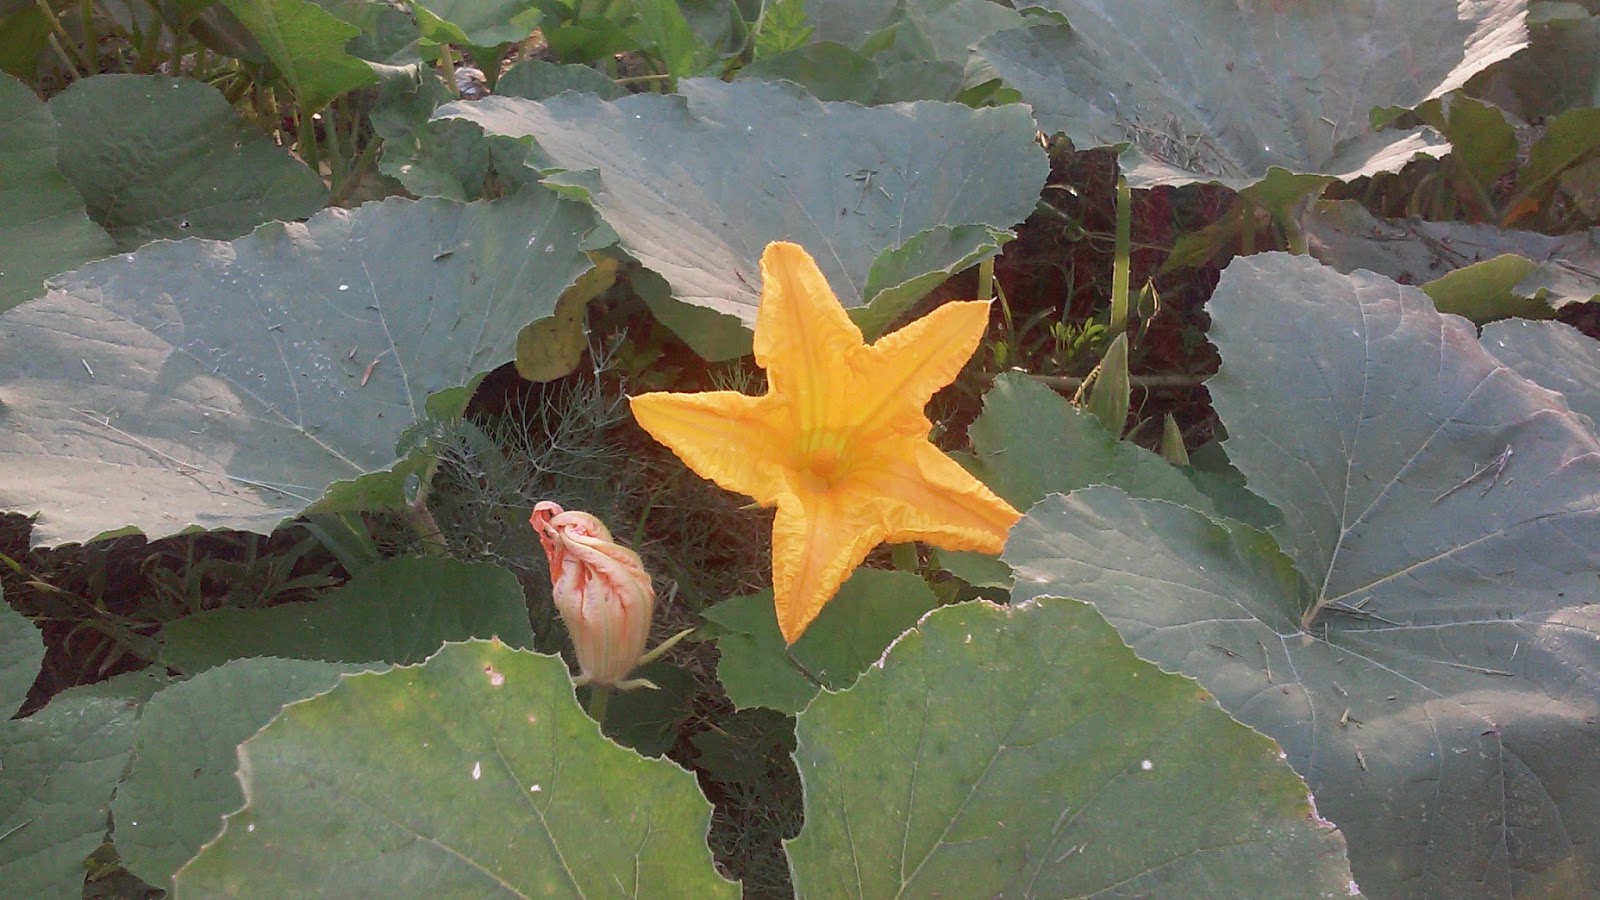
The good: Above is a picture of a win in my garden today. I finally have some zucchini and cucumbers coming in. 


The bad: This poor little guy fell out of his nest. We didn't touch it in hopes that the mother may come back and take care of it. We debated killing it and putting it out of it's misery. It was a very hot day and you could see that it was dehydrated and possibly hurt. 

Neither my husband or I could do it. We just could not bring ourselves to take it's life. This worried us because we realize that we will eventually have to take the life of an animal on our homestead if we are going to have dinner. This made us really think about our homesteading skills and how far we still have to go.

Hopefully we will be able to do it when the time comes. It just felt wrong to kill a baby animal. We have been checking on it daily and so far it looks like the mother is taking care of it. He has gained strength and every time we get near him the mother is right over our heads squawking away. 


The Ugly: Some may find mushrooms to be beautiful and to a point they are. I am just not that into them. We had a ton of rain in May and had these funky mushrooms in both the front and back yard. I have never seen this kind before. They kind of looked like orange asparagus.

It is kind of hard to see in the picture on the right, but that is mold growing in the chicken pen. The water mixed with the chicken droppings and just sat there and turned into this disgusting white mold. Thankfully everything has dried out now and the mold and mushrooms are gone.

I truly do love homesteading and all that comes with it. I am looking forward to showing you more of the beauty of homesteading and the new skills we learn in it in the coming months.

Saturday, June 27, 2015

Homemade Bread


There is nothing like the smell of fresh baked bread to make a house feel like a home. It always brings back memories of childhood and my mom baking bread for us. 

Last week we were out of bread and I really didn't feel like running to the store to get some so I decided to make a couple loaves. Even with the heat outside I am glad I decided to do it. My family loved it. 

I didn't get step by step pictures, but I thought I would share my recipe with you anyway. 

Two loaves of bread ready to be put in the oven. 

Homemade Wheat Bread

2 packages of yeast (or 4 1/2 teaspoons)
1 cup warm water
1 cup warm milk
1/2 cup butter
1/2 cup sugar
2 eggs
2 teaspoons salt
6 cups flour


Mix water and yeast in a bowl with 1 teaspoon sugar and set aside.

Combine dry ingredients in a large bowl and set aside.

In a small sauce pan warm the milk and butter just until the butter is melted. Do not overheat or it will be too hot and the yeast will not activate.

Add the eggs to the bowl of dry ingredients. Then add the milk and butter mixture. Last add the yeast and water mixture.

Combine all ingredients until a dough forms.

Knead the dough until it is smooth and elastic. This is where my kitchen aid mixer comes in handy. I attach the dough hook and let it do it's magic.

Once you finish kneading the dough place it in a large bowl and cover with a towel.

Place the bowl in a warm place and let the dough raise for 1 hour.

Outside on a sunny day is a great place. If it happens to be cold when you are baking in the oven is also a good place. I turn the oven on low and let it heat then turn it off. Place a small bowl of water next to the dough in the oven and it creates an amazing environment for letting dough raise.

After the dough has set for an hour punch it down and knead it again.

Form the dough into 2 loaves and place in 2 well greased bread pans. This recipe also makes wonderful rolls.

Allow the bread to raise for another 30 minutes.

After letting the dough raise for a second time it is ready to cook.

Bake bread at 350 degrees for 30 minutes or until it is golden brown.

Enjoy!

This picture has nothing to do with this post, I just liked it and thought I would share it with you. 

Friday, June 26, 2015

The Garden Is Starting To Take Off

Today I thought I would give you a tour of our summer garden. I am pleased with how well things are looking. Hopefully within the next couple of months we will have lots of fresh produce to eat and preserve for winter. 

Above is a shot of most of the garden. The pea trellis on the left looks pretty sad right now with nothing growing on it. I planted some beans in their place this week. With any luck the trellis will soon be covered again with yummy beans. 


The turnips are looking great. To be honest I am not sure when I am supposed to harvest them. I need to read up on it. Hopefully I am not too late. I am really looking forward to learning how to use them. 


The pole beans are looking ok. They are a bit slower to grow then I expected. I placed 3 buckets with 3 bamboo poles to create a teepee to try and grow them on. This is an experiment to see how they do in a container to save space. I have 2 sets of these.

The picture on the right is of my small patch of beets. What the rabbits haven't eaten looks good. Again this is a crop I am not sure when to harvest. I pulled a couple to thin them and the beet root was so small it was not even worth eating.


The tomatoes haves started really coming in. 


I have 9 buckets of tomatoes and about 5 or 6 more in the ground. I am really hoping to have a bumper crop so I can make lots of tomato and spaghetti sauce to can. 


Zucchini flowers are so pretty.


The cantaloupe will hopefully keep growing. My boys LOVE melon. 


We have a huge amount of dill that came up on it's own. I never planted it so I am guessing the previous owner must have planted it.

I understand why it is called dill WEED. I have been fighting it all spring. It has literally taken over in several places. I can not tell you how much of it I have pulled out and there is still more. I decided to let some of it go ahead and grow to use for pickles later.


I think this is another shot of the turnips.


 It looks like we will have lots of cucumbers as well. I am looking forward to my favorite summer salad of cucumbers, tomatoes and onion. 


Thursday, June 25, 2015

Harvesting Peas and Garlic

Fresh picked peas ready to be shelled

This is when gardening gets exciting. After planting early in the spring, watering, weeding, and waiting I am finally seeing the fruits of my labor. 

We have been enjoying picking fresh peas from the vine. When it comes to the snap peas we are lucky if they even make it into the house. 

I went out the other night and picked what was left of the peas from the withering vines. I managed to get enough to feed the family a side of peas at 2 meals. 

This may not seem like a lot, but considering I only planted a small amount of peas this year I thought it was pretty good. I also had enough to save for next years planting. I am hoping to plant a whole lot more. 

I also decided to go ahead and pull all the vines out to make room for another planting of pole beans.

With the small amount of gardening space we have I will have to get creative next year to plant everything I want to. I will make sure to keep you updated on how we do it. 


Picture of my tiny pea growing trellis. I am still happy with what we managed to get from about a 3-4 foot area.


 I planted 3 different varieties of peas this year. The snap peas are by far my favorite. On the left is a bowl of mammoth sugar peas and on the right are the snap peas I left on the vine so the seeds could mature. 


A big bowl of peas ready to be cooked and served for dinner


 I had the cutest helper with this chore. He loved it! It was also a good way to help him learn some fine motor skills.


After we shelled all the peas I made sure to save enough for planting next spring. I placed each variety on a tray from my Excalibur dehydrator and let the sun do the rest of the work.


 While I was picking peas I also noticed that the small patch of garlic I planted last fall was ready to harvest. I wish I had thought to get a picture of it while it was still in the ground so you can see what garlic looks like when it is ready to pull.

Basically the bottom leaves will start to turn yellow and wilt. I read that once garlic starts to wilt you need to dig it up soon or the cloves will start to pull apart and it will not store as well.

I think this is a pretty good harvest considering I only planted 1 bulb of garlic pulled into individual cloves.

To cure the garlic you need to lay it on the ground out of direct sunlight. In the garage is an ideal place. My garage smelled so good for several day.

I am not sure yet if I will mince it and dry it in my dehydrator or store it so it can be used fresh.

I will also be planing a lot more of this next year.

What have you been harvesting so far?

Wednesday, June 24, 2015

A Trip To The Local Greenhouse


Yesterday I decided to run to my local garden store to buy some of their eggs. While we were checking out I noticed they had summer squash for $1 a pound. Since mine has not come in yet we bought a couple of pounds.

As I was paying my 5 year old starting wandering and noticed the huge greenhouse full of flowers. She asked me if we could go look. Um YES! Did she really have to ask me?

I asked the owner to please keep my eggs and squash at the counter so I could wrangle the toddler and still keep up with my other kiddo.

Then the owner said "Everything is half price through today." Why did he have to tell me that? I have very little will power when it comes to buying plants.

I will say that that I did better then I thought I would. We only ended up buying 2 pepper plants, 1 watermelon and 3 six packs of flowers.

Seriously, I should never be turned loose in a greenhouse where all the plants are half off. It's a good thing the kids were with me.


Instead of buying just the eggs we ended up buying...


All of this plus the veggies that did not make it into the picture. 


We had such a great time exploring.


At least the kids look cute. Please excuse my terrible hair. I didn't have a chance to shower before we left.
 Thanks for visiting. Please check back often for more fun from Our Quarter Acre Homestead!

Tuesday, June 23, 2015

Clipping Chicken Wings


One of the things I don't like about backyard homesteading is that I have to clip my chickens wings. They don't like it and I always feel bad doing it. I know if doesn't hurt them, but I still feel a bit guilty putting them through it. We try to make is as stress free as possible.

The reason we clip our chickens wings is to keep them from flying on top of something in the yard and then flying over the fence into a neighbors yard...or worse over the back fence into the high school parking lot.

That could be interesting on a busy school morning watching a bunch of high schoolers help me wrangle a stray chicken back into my yard. Let's hope it never happens.

Clipping wings really isn't hard and only takes a couple of minutes. Honestly the hardest part was getting them all caught and into their pen so we could release each one back into the yard after they were finished.

We decided to get out a bucket if oats. Most of them fell for it and walked right into the pen and happily munched on oats. All except 2. We managed to catch one without too much trouble, but the last one had figured out what was going on and RAN.

You should have seen us chasing the poor thing all over the yard in the 90+ degree heat. Our toddler thought it was hilarious. We did eventually catch her, but not before Roger and I were both dripping in sweat.


To get started you need to try and get the chicken as calm as possible. Then spread out her wing like this. The feathers you are cutting are the long flight feathers.

Only clip ONE  wing per bird. This will throw off their balance when they try to fly. If you clip both wings they won't be able to fly, but there is always that one stubborn one who manages to fly a bit more then the rest. Save yourself the headache and only clip one wing.


Make sure you have a good, sharp pair of scissors. Clip just the flight feathers being very careful not to hurt the chicken by clipping too close and cutting into bone. They usually hold pretty still for this.


This is what it should look like when you are finished. And that is all there is to it. 


Now off to clean the coop while everyone is off catching bugs...well I didn't clean it, the hubby did. 


Monday, June 22, 2015

Garden Layout and Starting Seeds

The spring garden is looking great. 

Since this is our first year at our new house I decided not to plant too many things and what I did plant I only planted small amounts of so I could see what grows well and what we like...with the exception of tomatoes. We know we love tomatoes and all the things I can make with them.

The plan is to allow the chickens to help us expand the garden space for next spring with the use of a chicken tractor. I am hoping to double my space and plant much more once we decide what we like to grow.


Everything I am doing this year is basically an experiment and a learning experience. I know some things will flop, but hopefully a few will succeed.

I originally started my seeds in egg cartons, but after trying for several weeks I decided they were not going to work for me. I noticed that the seeds would sprout, but never got very big. I think it was because they did not have a deep enough space to grow good roots.

I finally decided to go to the hardware store and buy some seed starting trays. I was really trying to avoid buying many things which is why I first tried the egg cartons.

I filled each tray with a seed starting mix I bought and then planted 2 seeds in each spot. I then put the trays into clear plastic bags to create a greenhouse. Once they sprouted I either pulled out the weaker plant or transplanted the extra if I had 2 strong ones.


I was a little stumped on how to get them enough light because I did not want to invest in a grow light this year. I tried a shop light we already had and it did ok, but not great. I finally decided to just keep them warm and near a window and put them outside on nice days.

I think I will have to try something different next year. Things grew SO slow. Once they were finally transplanted to the garden they started to finally take off.


I decided try out a website called Plangarden to plot out and keep track of my garden this year. It is so helpful with keeping track of what I have and it is not on a piece of paper that can get lost. 

Above is a copy of this years spring garden. 

Garden Plot Before I got started with the bamboo trellis my husband made.
I started planting seeds in the outside garden as soon as I could. I was so excited to get things going. For the spring garden we planted...
  • Peas
  • carrots
  • potatoes
  • onions
  • garlic (planted in October)
  • broccoli
  • lettuce
  • parsnips
  • beets
  • spinach
  • radishes
The things that did well were...
  • peas
  • garlic
  • lettuce
  • parsnips
  • beets
  • spinach
  • lettuce
  • radishes
Things that did not do well, but I will try again next year or in the fall
  • carrots
  • potatoes
  • broccoli


I also set up a chart in plangarden for my summer garden, above. 

This year I decided to try out...
  • Buttercup squash
  • Table Queen Squash
  • Jack-O-Lantern Pumpkins
  • Butternut Squash 
  • Green Striped Pumpkins
  • Pole Beans
  • Watermelon
  • Cantaloupe
  • Cucumbers
  • Zucchini
  • Tomato
  • Bell Pepper
  • Oregano
  • Rosemary
  • Sweet Basil
  • Purple Basil
  • Currents (Planted by previous owner)
  • Walnuts (Huge tree by the back fence)
So far everything is doing well except for...
  • Watermelon (All plants drowned with all the rain we had)
  • Bell peppers
Due to lack of space this year we decided to plant several things in buckets. I am anxious to see how everything does in them. I have some tomatoes planted directly into the ground and the rest in buckets. I am planning to compare how they do in the different places. 


Buckets of tomatoes


Baby radishes. My 5 year old planted them all by herself.

 Spinach sprouts planted by my 7 year old.


This post contains affiliate links