Header/Navigation Bar/Social Media Icons

Thursday, April 14, 2016

Dryer Balls


Today I thought I would give you a quick tutorial on how I make dryer balls. I hate to buy dryer sheets because I am just going to throw them away once they are used plus I didn't like the idea of adding chemicals to my clothing just to make them soft and smell good. So for years I used nothing. I had friends who thought I was crazy and that my towels must feel like burlap. I have never dad any complaints from the family unless I line dry clothes. 

I kept seeing dryer balls on homesteading sites so about a year ago I decided to go ahead and try making my own. I called up my mother-in-law and asked if she had any leftover wool yarn from one of her many projects. She sent home a bunch of remnants and my 10 year old and I set to work making dryer balls. 

I have decided that dryer balls are wonderful! You can add your own essential oils to them to freshen your laundry. If you use 5 or 6 in a load it will not only soften your clothes, but will help cut drying time!


Here is a photo of some of what we ended up with. Sorry the picture came out so blurry, but you get the idea. Since it was May when we were making them I decided to go ahead and send some to the kids teachers along with some essential oils as an end of the year teacher gift. They were a hit. 

I did my best to get step by step pictures of how I made our dryer balls so you can get started making your own.


To get started you need to make sure you are working with 100% wool yarn or this project will not work properly. At the end you need to felt your balls. So wool is essential. 

I start my balls by simply looping some yarn around my fingers a couple of times. 


Next I wrap the yarn around the loops I just made to give me something to hang onto. The first steps can be a bit frustrating since there is not a large amount of yarn to hold.


Keep wrapping until you start to form a small ball. Then keep wrapping some more. Making sure you move the yarn around the whole ball so  it is round.


After a while you should have a good size ball. The size is really up to you. I did not make the one for this tutorial very large because I started to run out of yarn, plus I was feeling a bit lazy.


To finish off your ball take a crotchet hook and do your best to pull the yarn through the center of the ball. As you can see from this picture I looped it through the side. This is really not the best idea because it may unravel slightly. It will still work, but may not be as pretty. 


I typically pull my yarn through several time before tying it off to make sure everything is secure. 


The final step to making dryer balls is to felt them so they don't unravel in the dryer leaving you with a big mess of clumped yarn along with your clothes. To felt them you can place them in an old pair of panty hoses and tie them off to make a bag. Run the balls threw the washing machine 3-4 times. I usually just toss the bag in with a load I am washing so I am not wasting water. 

After you have washed them several times they should have felted or stuck together. Above is a picture of an unfelted ball (purple) and a felted one (green). It is hard to tell from the photo, but the purple one is much looser and the green one is tight and stuck together. 


There you have it! Easy dryer balls. Don't forget to add a couple of drops of essential oils to one before tossing it in with your laundry. My families favorite is lavender or some sort of citrus. 


Saturday, July 18, 2015

How To Braid Garlic


I have to start this post by apologizing for my less then stellar photos....not that my usual ones are all that great. These just seem to be much worse then usual. One of these days I will be able to invest in a better camera, but or now my camera phone will have to do. Thanks for sticking around     anyway.

I have always been intrigues by beautiful braids of dried garlic so I decided that this year I would have to learn how to do it. It really was not nearly as hard as I had expected it to be.  Basically if  you can braid a simple braid you can do this.

Before you braid your garlic you need to make sure it is completely cured. Mine has been sitting in my garage for about a month now and was nice and dry.


To get started take 3 garlic stalks and lay them next to each other. 


Start braiding them just like a normal braid.


After you have the braid started you will then add a new garlic stalk to each of the 3 you already have in the braid. At this point you should have 6 garlic bulbs.

Keep doing the same thing until you have used up all your garlic or you think the braid is large enough.


Remember to keep adding the garlic bulbs in multiples of 3. My poor garlic is so ugly. I could not get all the dirt off no matter how hard I tried. It was cemented on and I did not want to break any of the bulbs.


After all your garlic has been added to the braid you just keep braiding the rest of the stalk all the way up to finish it off. I used a piece of twine to tie off the top and to use as a loop for hanging.

Hopefully by now you have a nicely braided bundle of garlic to store for later use. I am for sure going to have to grow LOTS more garlic next year now that I know how easy it is to grow, cure and store. Especially since we eat so much garlic around here.

Thursday, July 16, 2015

All Natural Bee And Wasp Sting Treatment That Works!


Last summer both my mom and daughter ended up with nasty wasp stings. I used this treatment on both of them and within minutes they both saw relief.

My daughter got stung right on the face near her ear. She does not handle pain well so I was excited to see how quickly she felt better.

This treatment is simple and only uses natural ingredients. If you haven't noticed yet I use a lot of lavender oil around here. It seems to be my go to when one of the kids has a skin issue.

Ok, here we go...

You will need some bentonite clay and lavender oil for this treatment. As well as some sort of gauze and wrap to hold everything on. Whatever you have on hand should work.


To start with take about a tablespoon or so of the bentonite clay and mix it in a small bowl until you get a thick paste. You want it to be able to stick to the skin.


Next you want to apply one drop of lavender oil directly on the sting. Check to make sure the stinger is out. If it is still there this treatment will help, but it will continue to hurt until the stinger is removed. If the stinger is still in it will continue to deliver poison to the wound causing pain.

After you are sure the stinger is out and you have applied the lavender oil take a small spoonful of the bentonite clay mixture and place it on the sting.

My daughter could not figure out why I was putting mud on her. She thought it was a little weird, but I didn't hear any complaining once she figured out it worked.


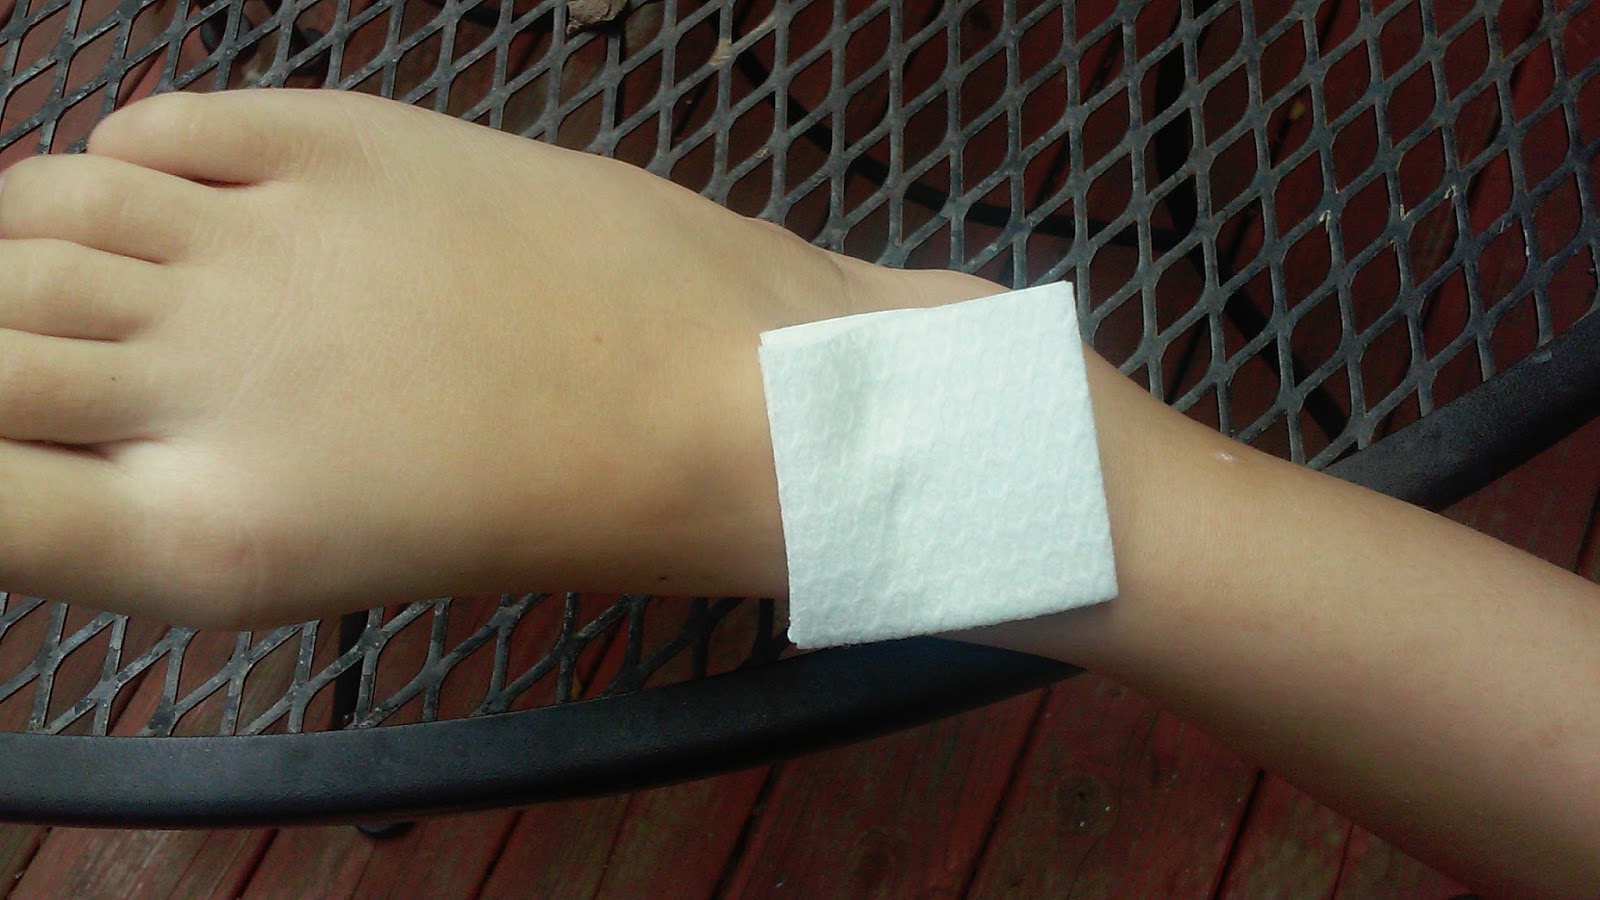
After you have the oil and clay in place you want to keep it there. The best way I have found to do this is to cover the sting with some gauze.


Next you want to hold the gauze in place. I happened to have some medical tape so I used it to tape the gauze on. An ace bandage would work as well.


After you have everything in place allow it to sit for an hour or so. You can replace the clay as needed until the pain is gone. In my experience we have only had to maybe replace everything once. My mom's sting took a day or so to heal because we did not notice the stinger was still in her finger. Once the swelling went down we were able to scrape it out and reapply the oil and mud and it was better within 24 hours.

Please remember that I am not a doctor, just a mom sharing what has worked for me. If you notice any excessive swelling or redness please discontinue this treatment and see a doctor. Especially if you think you may be having an allergic reaction to a sting.

This post contains affiliate links.

Friday, July 3, 2015

Homemade Vanilla, Cinnamon And Mint Extract


I started making my own vanilla years ago and have never looked back. It is so much cheaper then the store bought kind as well as better quality.

If you start your own extracts now they should be ready in time to give as gifts for Christmas.

This summer at our new house we have an abundance of mint growing so I decided to venture out and try making mint extract as well.

Then I figured as long as I was at it I might as well try cinnamon extract since I already had all the ingredients.

Making extract is seriously so easy. Anyone can make these.


The processes is the same for all three


Vanilla Extract:

You will need 7 vanilla beans and one cup of vodka. The cheaper the better. There is not need to spend extra money on quality vodka. I always feel strange when I go into the liquor store to buy vodka since I don't drink it and I usually buy 2 of the large bottles of the cheap stuff. I wonder what they must think of me. Especially when I get back into my minivan.

I usually cut open each bean and scrape out the insides. I add all the beans and the insides to an 8 oz mason jar (sometimes I double it.)

Next add the vodka and place a lid on it.

Give the jar a good shake and then put it in a cabinet and let it sit for 3-6 months. Give it a good shake every now and then.


Cinnamon Extract:

For the cinnamon extract I took 3 cinnamon sticks and added 1 cup of vodka.

Place a lid on it and store for 3-6 months.

Mint Extract:

Fill a mason jar about half way with fresh mint leaves. If you don't have any in your garden you can buy them in the produce department of the grocery store.

Finish filling the jar with vodka and let sit for 3-6 months.

There you have it. Three super easy ways to save yourself money in the kitchen.


This post contains affiliate links